
Duy Vu
September 25, 2025
•
10 mins read

How often does your finance team have to ask someone else for data they need to do their job? The simple question, "Can you check on this payment for me?" often creates a chain reaction of delays, pulling in team members who have to drop their work to act as gatekeepers to the Stripe dashboard.
This isn't just a process problem; it's an empowerment problem. When your most critical teams can't access the data they need, they can't operate autonomously. This creates friction, slows down customer support, and leaves your finance experts feeling blocked and frustrated. The common solutions are flawed: giving everyone admin access is a non-starter for security, and buying yet another specialized SaaS tool just adds to the software bloat.
What if you could give your finance team a tool that provides exactly the data and actions they need—no more, no less?
This is the power of building self-service applications. In this guide, we'll give you the blueprint to build a secure Stripe dashboard in Retool. You won't just be building a report; you'll be building an engine for empowerment, giving your finance team the autonomy to solve problems on their own, instantly.
The foundation of any powerful tool is secure data access. We'll connect Retool to Stripe using an API key. For maximum data security, we strongly recommend creating a Restricted API Key in Stripe that only has the permissions this tool needs: reading charges (charges:read) and creating refunds (refunds:write).
Stripe_Finance_Ops.Retool now has a secure, tokenized connection to your Stripe account, ready to be used in any application you build.
Let's get your data on the screen. Our goal is a table that shows the latest payments and refreshes automatically.
Stripe_Finance_Ops resource you created in Step 1.get_payments.Core Resourcescharges → listlimit to 100.60 seconds.To connect this data to your table, click on the Table component. In the Inspector panel on the right, find the Data property and set its value to {{ get_payments.data }}. You should instantly see your Stripe transactions populate the table!
A list of 100 payments is useful, but your team needs to find specific ones instantly.
email_search) and a Button onto the canvas.find_customer query: Use the operation customers -> list and set the email parameter to {{ email_search.value }}.search_payments query: Use the operation events -> list, set the type to charge.succeeded, and critically, set the customer parameter to {{ find_customer.data[0].id }}. This tells the query to first find the customer, then find their successful charges.find_customer query on click. On success of that query, trigger the search_payments query.*Amount:** ${{ (payments_table.selectedRow.amount / 100).toFixed(2) }}.{{ !payments_table.selectedRow }}.This is where you turn a data viewer into an actionable tool.
create_refund.Core Resources → refunds → create.charge parameter, dynamically pass the ID from the selected table row: {{ payments_table.selectedRow.id }}.onClick event handler, configure it to first Show a confirmation modal (e.g., "Are you sure you want to refund this charge?") and then, on confirmation, Trigger query and select create_refund.create_refund query. In its Event Handlers, add an "On success" handler that triggers your main get_payments query to refresh the table.Let's make this tool proactive. Instead of just pulling data, let's have it push insights to your team.
post_daily_summary using your Slack resource. Choose the postMessage action and select a channel like #finance-reports.Daily Stripe Summary for {{ moment().format('MMMM Do, YYYY') }}:\\n*Total Revenue:* $XXXX.XX0 17 * * 1-5).You’ve now replaced a slow, 5-minute manual process with a secure, 30-second workflow. By building this custom dashboard, you have:
You didn't just build a dashboard; you built a custom workflow engine perfectly tailored to how your team operates.
See for yourself how quickly you can turn business challenges into powerful, secure applications. Sign up for a free Retool account and start building with us today.
Looking to supercharge your operations? We’re masters in Retool and experts at building internal tools, dashboards, admin panels, and portals that scale with your business. Let’s turn your ideas into powerful tools that drive real impact.
Curious how we’ve done it for others? Explore our Use Cases to see real-world examples, or check out Our Work to discover how we’ve helped teams like yours streamline operations and unlock growth.
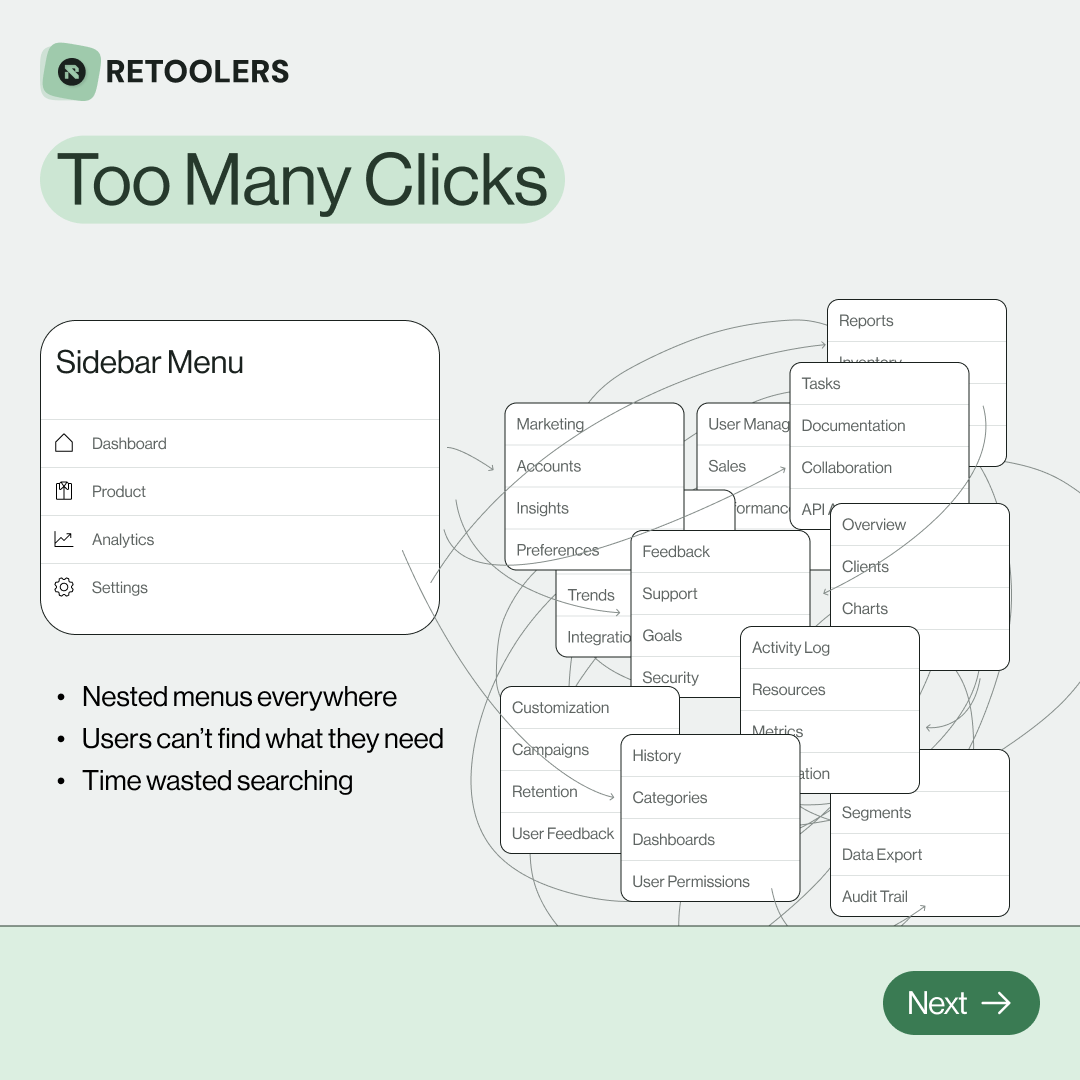
🔎 Internal tools often fail because of one simple thing: Navigation.
Too many clicks, buried menus, lost users.
We broke it down in this 4-slide carousel:
1️⃣ The problem (too many clicks)
2️⃣ The fix (clear navigation structure)
3️⃣ The Retool advantage (drag-and-drop layouts)
4️⃣ The impact (happier teams)
💡 With Retool, you can design internal tools that are easy to use, fast to build, and simple to maintain.
👉 Swipe through the carousel and see how better UX = better productivity.
📞 Ready to streamline your tools? Book a call with us at Retoolers.

🚀From idea → app in minutesBuilding internal tools used to take weeks.
Now, with AI App Generation in Retool, you can describe what you want in plain English and let AI do the heavy lifting.
At Retoolers, we help teams move faster by combining AI + Retool to create tools that actually fit their workflows.
👉 Check out our blog for the full breakdown: https://lnkd.in/gMAiqy9F
Before we quote, we help you clarify the workflow. Share your idea, process, or existing tools, and we’ll map the key requirements, suggest the right system, and create a free wireframe so you can see the solution before development starts.


