
Na Vuong
June 14, 2024
•
10 min read

Integrating Webflow's CMS with Retool allows you to manage your website's content more efficiently. This blog provides a step-by-step guide on connecting Webflow's Collection and Items APIs to Retool, enabling you to create, update, and delete content directly from a custom interface. By following this guide, you can streamline your content management workflow and enhance your website's functionality.
Webflow has many API features you could make use of from anywhere to help you in managing your Webflow website. Among those APIs is the CMS API, which in this guide, we’ll utilize to see how we can manage data of a Webflow website from outside Webflow itself. Webflow CMS API is a robust, full-featured content management system that provides a platform for you to manage and update your website's content. It's designed to be flexible and powerful, allowing you to create a custom content structure that suits your specific needs.

Webflow provides a Collection API and an Items API, which are integral parts of the Webflow CMS. The Collection API allows you to manage your website's collections, while the Items API is designed for managing individual items within those collections.

Collections in Webflow are equivalent to tables in a database, each containing a set of structured data.
Items are simillar to rows in a table, each representing a specific piece of content.
By leveraging these APIs, you can programmatically manage your Webflow CMS, enabling greater flexibility and control over your website's content.
One of the most exciting features of Webflow's Collection and Items API is that they allow you to create your own Webflow CMS from anywhere. This means that you can create, update, and more things to manage ****your Webflow CMS content from any app or code repository, as long as you have access to the internet to hit their API.

IMPORTANT: Make sure you are you enable read and write access for CMS in the API settings.

/sites/{site_id}/collectionsYou can now do any kind of actions like create, update, delete or publish for your collections, as well as for items you plan to have within that collection from any application you plan to use.
You can see more endpoints that you could use depending on your use case here:
All that’s left is develop and create the UI that fits your preferrence to manage the CMS.
Some important things about managing collections and their items
IMPORTANT* using the Delete endpoint to remove a content will not remove it from the live site. So be sure to Unpublish first (Delete Live) before the deletion of the content from the CMS. In case you happened not to do this step accidentally, you can get the live items and retrieve the id of the content you want to remove from the live site using the Get Live endpoint
After your done with creating functionalities to manage your CMS, make sure that that implementation of is working compatibly with how you want it to be. You can use some API testing tools to do this efficiently.
Webflow’s webhooks allow you to automate tasks by sending real-time notifications when specific events occur in your Webflow CMS. By creating webhooks, you can sync data from the CMS to external systems or applications, ensuring that changes in your Webflow content are reflected elsewhere without manual intervention.
TTo create a webhook in Webflow, follow these steps:
You can create a webhook in two ways:

collection_item_changed - Sends the collection_item_changed event
collection_item_created - Sends the collection_item_created event
collection_item_deleted - Sends the collection_item_deleted event
IMPORTANT: The webhook events you can create through the site settings is limited, whereas creating a webhook through API allows for more event options
Enter the webhook URL where the notifications should be sent. This is the endpoint of your external system or application that will process the data. After reviewing your settings and saving the webhook. Webflow will now send HTTP POST requests to the specified URL whenever the selected event occurs and you can do some conditional data processing based on which trigger type is sent.
By effectively using Webflow’s webhooks, you can ensure real-time synchronization between your Webflow CMS and external systems, maintaining consistency and reducing the need for manual updates.
By having known these things and following out this guide, you can effectively use Webflow’s API to create and manage a custom CMS tailored to your needs. You won’t have to go to Webflow Designer and wait for it to load and manage your CMS, specially when testing out content changes where a full refresh on the designer is needed.
Ready to bring your dashboard vision to life? Contact Retoolers today, and let us help you create a powerful, intuitive dashboard that meets your exact requirements.
Looking to supercharge your operations? We’re masters in Retool and experts at building internal tools, dashboards, admin panels, and portals that scale with your business. Let’s turn your ideas into powerful tools that drive real impact.
Curious how we’ve done it for others? Explore our Use Cases to see real-world examples, or check out Our Work to discover how we’ve helped teams like yours streamline operations and unlock growth.
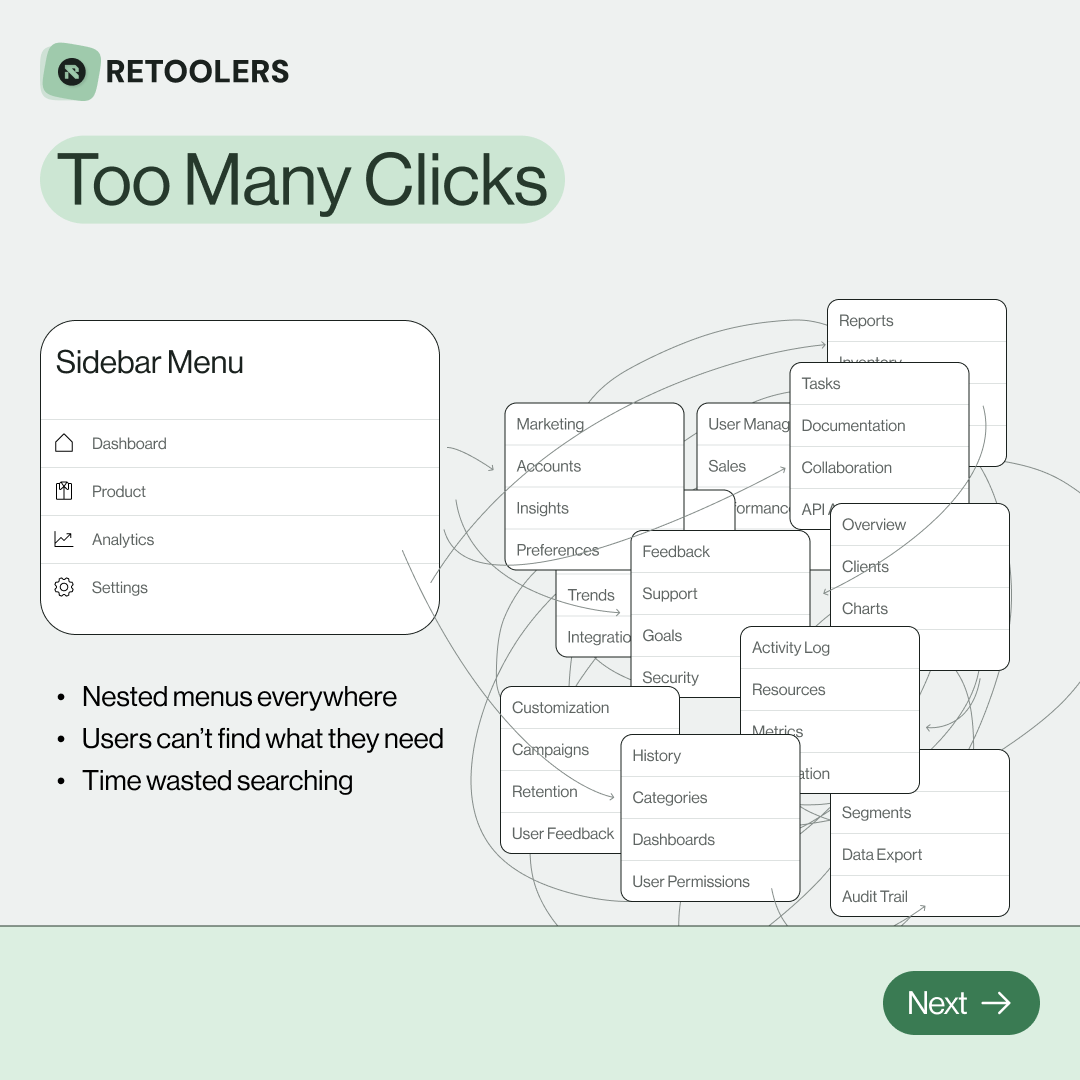
🔎 Internal tools often fail because of one simple thing: Navigation.
Too many clicks, buried menus, lost users.
We broke it down in this 4-slide carousel:
1️⃣ The problem (too many clicks)
2️⃣ The fix (clear navigation structure)
3️⃣ The Retool advantage (drag-and-drop layouts)
4️⃣ The impact (happier teams)
💡 With Retool, you can design internal tools that are easy to use, fast to build, and simple to maintain.
👉 Swipe through the carousel and see how better UX = better productivity.
📞 Ready to streamline your tools? Book a call with us at Retoolers.
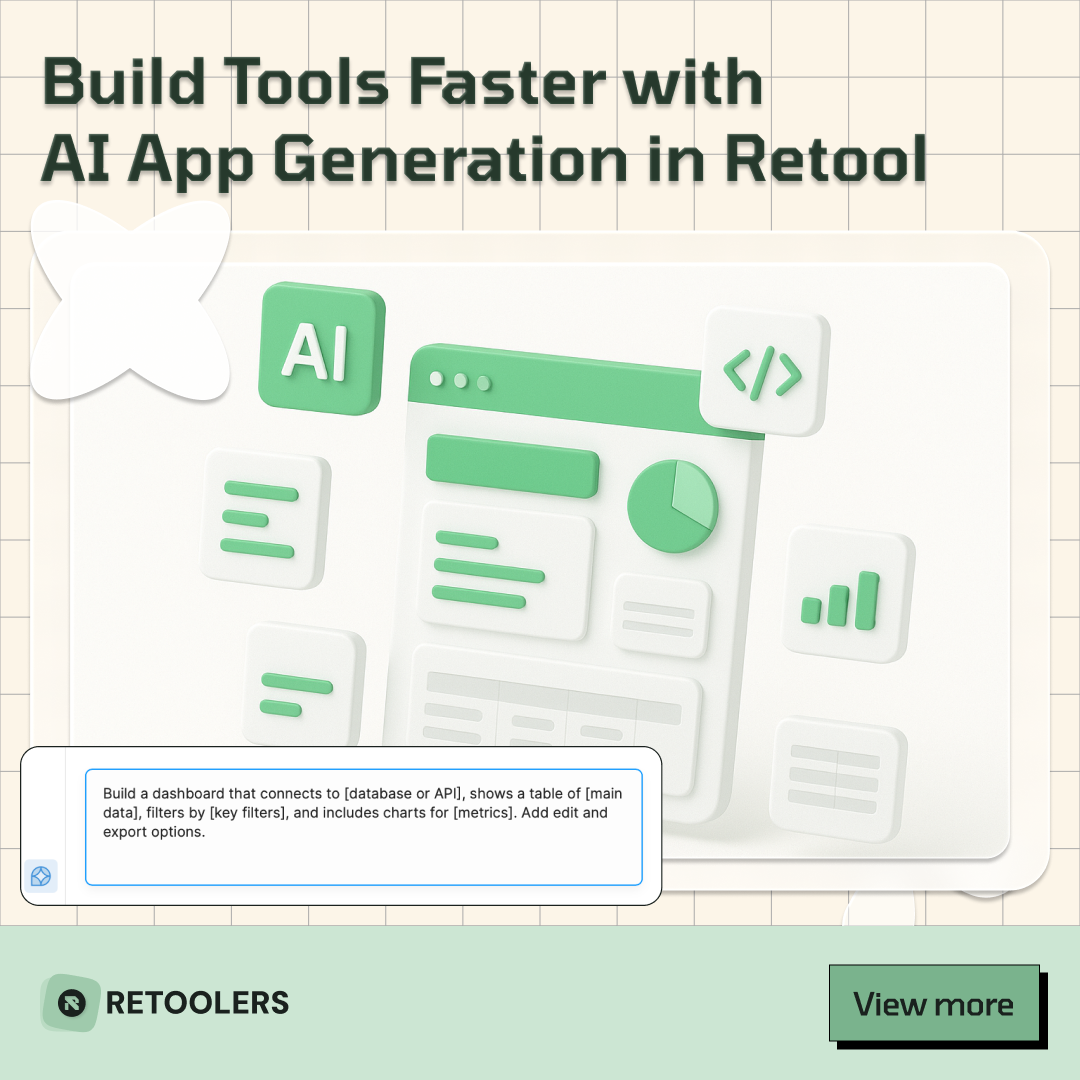
🚀From idea → app in minutesBuilding internal tools used to take weeks.
Now, with AI App Generation in Retool, you can describe what you want in plain English and let AI do the heavy lifting.
At Retoolers, we help teams move faster by combining AI + Retool to create tools that actually fit their workflows.
👉 Check out our blog for the full breakdown: https://lnkd.in/gMAiqy9F
Before we quote, we help you clarify the workflow. Share your idea, process, or existing tools, and we’ll map the key requirements, suggest the right system, and create a free wireframe so you can see the solution before development starts.


